
How to Apply Classic Nail Wraps Step-by-Step
Classic Nail Wraps: Everything You Need to Know
If you've ever spent twenty minutes painting your nails only to smudge them reaching for a cuppa, you already understand the appeal of nail wraps. They give you a flawless, chip-free manicure in a fraction of the time — no drying, no mess, no salon appointment needed.
Classic nail wraps are the simplest way to get salon-quality nails at home. You peel, apply, file, and you're done. No UV lamp, no special skills, no waiting around for polish to dry. Just beautiful nails in under fifteen minutes.
This guide covers everything: what classic nail wraps actually are, how to apply them properly, how to make them last, and how to remove them safely. Whether you're a complete beginner or you've been doing your own nails for years, there's something here for you.
What Are Classic Nail Wraps?
Classic nail wraps are thin, self-adhesive strips designed to cover your entire nail in a single piece. Unlike traditional polish, there's no painting involved — you peel a strip from the sheet, press it onto your nail, file off the excess, and that's your manicure done. No drying time, no streaks, no clean-up around the edges.
The best nail wraps are made with real nail polish rather than printed ink or cheap vinyl. This gives them a richer colour, a more natural look on the nail, and a glossy finish that actually resembles a freshly painted manicure.
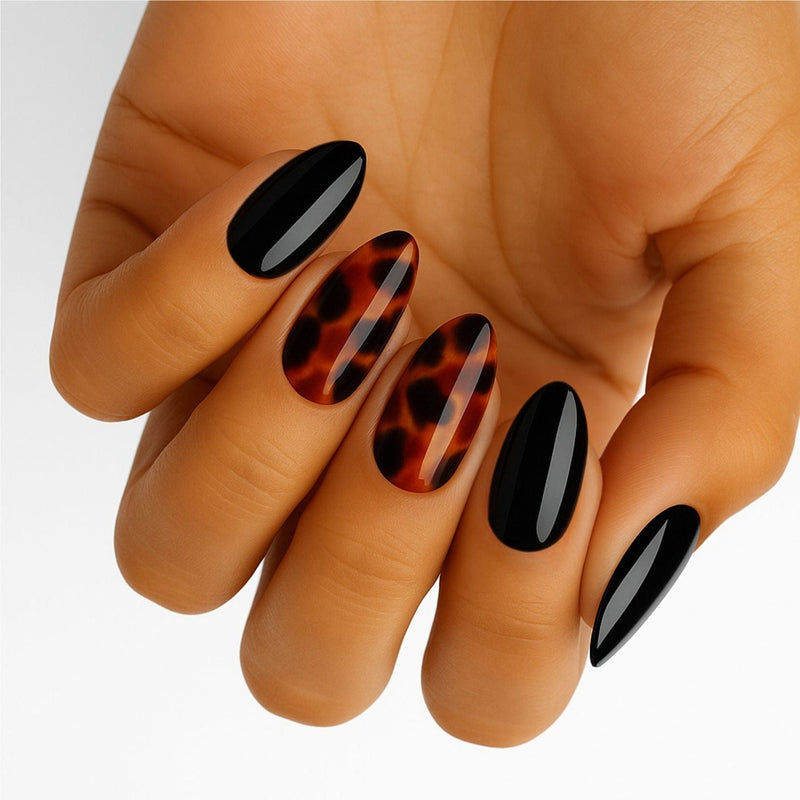
They come in hundreds of designs — solid colours, glitter, French tips, florals, animal print, ombré, marble effects — essentially any design you can imagine on a nail, someone has turned into a wrap.
Our Classic Nail Wraps are crafted with real nail polish and come in over 500 designs. Each pack contains 16 self-adhesive wraps, and they work on all nail types: natural, gel, shellac, and acrylic.
Who Are Classic Nail Wraps For?
Classic nail wraps suit pretty much everyone, but they're especially good for:
Beginners. If you've never tried nail wraps before, Classic Nail Wraps are the place to start. No lamp, no curing, no accessories beyond a nail file. You can do your first set in under fifteen minutes.
People who like to switch things up. Because application is so quick and removal is gentle, you can change your design weekly without any guilt or damage. Try a bold leopard print one week and a subtle nude the next.
Anyone short on time. Salon appointments eat into your schedule. Nail wraps let you do your nails at 10pm on a Sunday, during a lunch break, or while watching telly. No booking, no commuting, no waiting for polish to dry.
People with gel allergies. If you've had reactions to salon gel nails, nail wraps are a great alternative — they contain no gel, no HEMA, and no UV curing is involved.
How to Apply Classic Nail Wraps: Step by Step
Proper application is the single biggest factor in how long your wraps last. Rushing the prep is the main reason people get disappointing results. Take your time here and the payoff is a manicure that lasts up to two weeks.
Step 1: Prep Your Nails
This is the step most people skip — and it's the most important one. Push your cuticles back gently with a cuticle stick. Wash your hands with soap and dry them thoroughly. If you have naturally smooth or oily nails, lightly buff the surface with a buffer block to give the adhesive something to grip.
The goal is a clean, dry, oil-free nail surface. Any residue from hand cream, cuticle oil, or natural oils will weaken the bond and cause lifting.
Step 2: Choose the Right Size
Select a wrap that fits your nail width. If you're between two sizes, go slightly smaller rather than larger — a wrap that touches your cuticle or skin at the edges will start to lift within a day. You want a tiny gap between the wrap and your cuticle line.
Most packs include wraps in several sizes, so there's plenty to work with. It's always easier to start slightly large and trim down than to use one that's too small.
Step 3: Apply the Wrap
Peel the wrap from the sheet — avoid touching the adhesive side with your fingers. Align the curved edge just above your cuticle and press down firmly, smoothing from the centre outward to push out any air bubbles. Use a cuticle stick or your finger to press the edges down securely.
Take your time here. A smooth application means a better-looking, longer-lasting result.
Step 4: File Off the Excess
Fold the excess wrap over the tip of your nail and file downward at a 90-degree angle. Always file in one direction — downward only, never side to side or upward. This seals the wrap against your nail edge and prevents lifting at the tips.
Step 5: Seal with a Top Coat
This step is optional but makes a real difference. Apply a thin layer of top coat over the wrap, making sure to cap the free edge (the tip) of each nail. This seals everything in place and can extend wear from one week to two or even three.
Our Magic Gloss Top Coat is designed to work perfectly with our Classic Nail Wraps — it adds a high-gloss finish and creates a protective barrier against daily wear.
Step 6: Let Them Set
The best time to apply nail wraps is before bed. This gives the adhesive several hours to fully bond without interference from water or hand-washing. Try to avoid submerging your hands in water for at least four hours after application.

How Long Do Classic Nail Wraps Last?
Classic nail wraps typically last 7 to 14 days, depending on your nail prep, daily activities, and whether you use a top coat. With good prep and a quality top coat sealing the edges, many people comfortably get two weeks of wear.
A few things affect longevity:
Nail prep quality. This is the biggest factor. Oily or poorly prepped nails will cause lifting within days. Clean, dry, buffed nails can hold wraps for two weeks or more.
Water exposure. Prolonged soaking — dishes, baths, swimming — weakens the adhesive faster than anything else. Quick hand-washing and showers are fine.
Daily activities. If you work with your hands a lot, tip wear will show sooner. This is normal and can be managed by recapping the tips with top coat every few days.
How to Make Your Wraps Last Longer
A few simple habits make a real difference to wear time.
Wear gloves for washing up. Water — especially prolonged hot water — is the biggest enemy of nail wrap adhesive. Showers and regular hand-washing are fine, but use rubber gloves for dishes and cleaning.
Don't use your nails as tools. Opening cans, peeling stickers, and scratching surfaces all put stress on the wrap edges. As we like to say — your nails are jewels, not tools.
Reapply top coat every few days. A fresh layer refreshes the seal and adds another barrier against chips and lifting, especially at the tips where wear shows first.
Apply cuticle oil daily. This keeps your nails and cuticles hydrated, which supports better adhesion and healthier nail growth overall.
Store unused wraps properly. Keep leftover wraps in their original packaging, sealed away from sunlight and moisture. Air exposure can dry out the adhesive over time, so reseal the packet after each use.
How to Remove Classic Nail Wraps Safely
Safe removal matters more than most people realise. Peeling or forcing wraps off pulls at the top layer of your natural nail, causing thinning and damage over time. Never do this, no matter how tempting it is when you're ready for a fresh set.
The gentle approach: Apply nail polish remover or our Magic Remover around the edges of the wrap. Let it soak in for a moment, then use a wooden cuticle stick to gently lift the wrap from the base. Work slowly — if there's resistance, add more remover and wait.
What to avoid: Never scrape, peel, or force wraps off. If a wrap doesn't budge easily, soak your nails in warm, soapy water for a few minutes and try again.
After removal: Apply cuticle oil or a nourishing hand cream to rehydrate your nails. If you're applying a new set straight away, make sure you prep fresh — clean, dry, oil-free — before starting.
Classic Nail Wraps vs. Salon Manicures
The comparison isn't just about cost — though that matters too.
Time. A salon manicure takes 45 to 90 minutes including travel. Classic nail wraps take 15 minutes at home.
Cost. A salon manicure in the UK typically costs £30 to £60 per visit. A single set of nail wraps costs a fraction of that — and our starter kits save 25% compared to buying items individually.
Nail health. This is where wraps really stand out. Salon manicures require filing the nail surface for adhesion and often involve acetone soaking for removal, both of which damage the nail over time. Nail wraps sit on top of the natural nail and are removed gently. Many of our customers tell us their natural nails are healthier, longer, and stronger since switching to wraps.
Convenience. Do your nails whenever suits you. No booking, no commuting, no awkward small talk if you're not in the mood.
Classic Nail Wraps vs. Gel Wraps: What's the Difference?
We get asked this a lot. Both are nail wraps, but they work differently and suit different needs.
Classic Nail Wraps are made from real nail polish. No lamp needed. They last 7 to 14 days, apply in under 15 minutes, and are the simplest option — perfect for beginners or anyone who likes to change designs frequently.
Gel Wraps are made from semi-cured gel polish and require curing under a UV/LED lamp for 120 seconds. They give a thicker, glossier finish and last 2 to 3 weeks. They're the closest at-home equivalent to a salon gel manicure.
Choose Classic Nail Wraps if you want speed, simplicity, and no extra tools. Choose Gel Wraps if you want maximum durability and that high-gloss gel look.
Not sure? Our Classic Nail Wrap Starter Kit is a great place to begin — it includes five nail wrap sets of your choice plus a top coat, all at 25% off.


Getting Started: The Classic Nail Wrap Starter Kit
If you're new to nail wraps, a starter kit is the simplest way to get everything you need in one go. Our Classic Nail Wrap Starter Kit includes:
- 5x Classic Nail Wrap sets of your choice (from over 500 designs)
- 1x Magic Gloss Top Coat or Ultimate Duo Pack
- 1x FREE Mani Makeup Bag (pink or black)
From just £36.70 (saving 25% vs. buying items individually). No lamp required — everything you need is in the box.
Build your Classic Nail Wrap Starter Kit →
Why Choose Holy Grail Nail?
We're not the only nail wrap brand out there, but here's what sets us apart.
Over 1,000 designs across our Classic, Gel, Crystal, and Press-On collections — from solid colours and French tips to glitter, chrome, florals, and seasonal specials.
Made with real polish. Our Classic Nail Wraps use real nail polish, not printed vinyl or cheap stickers. That's what gives them their rich colour payoff and natural look on the nail.
HEMA-free, vegan, and cruelty-free. Every product. No exceptions.
Better for your nails. No filing, no drilling, no heavy acetone soaking. Many customers tell us their natural nails are healthier since switching from salon manicures.
Rated 4.9 stars from over 6,000 reviews. Top mentions from customers: quality, ease of application, great designs, and long-lasting wear.
Frequently Asked Questions
How long do classic nail wraps last? Classic nail wraps last 7 to 14 days. Good nail prep and a top coat make the biggest difference — with both, many people comfortably get two weeks.
Are nail wraps bad for your nails? No — they can actually be better for your nails than salon manicures. There's no filing of the nail surface, no drilling, and removal is gentle. Many customers find their natural nails grow longer and stronger underneath.
Do I need a UV lamp for classic nail wraps? No. Classic nail wraps don't require any lamp — that's one of their biggest advantages. You only need a UV lamp for our Gel Wraps and Crystal Wraps.
Do nail wraps work on short nails? Absolutely. Most packs include multiple sizes, and wraps can be trimmed to fit. Short nails actually tend to get slightly longer wear because there's less tip exposure.
Can I apply wraps over gel or acrylic nails? Yes. Classic nail wraps work on natural, gel, shellac, and acrylic nails. Just make sure the surface is clean, smooth, and free from oils.
What if my wraps start to lift? Press the wrap back down gently. If it keeps lifting, apply a small amount of top coat to seal the edge. Avoiding prolonged water exposure and keeping cuticles moisturised also helps prevent lifting.
How do I store leftover wraps? Keep them in their original packaging, sealed away from sunlight and moisture. Stored properly, they'll stay ready to use for months.
Are your products safe for sensitive skin? All Holy Grail Nail products are HEMA-free, which removes one of the most common allergens in nail products. If you have a known sensitivity, we'd recommend doing a patch test first — but many customers with previous gel allergies use our products without issues.
Ready to Try Classic Nail Wraps?
Browse our full Classic Nail Wraps collection with over 500 designs, or start with a Classic Nail Wrap Starter Kit to save 25% and get everything you need in one box.
All Holy Grail Nail products are HEMA-free, vegan, and cruelty-free.