Master Nail Wrap Application Techniques for Flawless Results
How To Apply Nail Wraps Perfectly: Master Application Techniques for Flawless Results
Nail wraps offer an easy way to achieve salon-quality manicures at home. These thin adhesive coverings adhere directly to your natural nails, providing an instant, durable finish that can last up to two weeks with proper application.
Whether you're looking for traditional nail wraps, gel nail wraps, or press ons, this comprehensive guide covers everything you need to know about application, including preparation, sizing, smoothing techniques, troubleshooting, and product-specific instructions for Holy Grail Nail's complete range.
Essential Steps for Flawless Nail Wrap Application
Perfect nail wrap application combines careful preparation, correct sizing, precise placement, and secure sealing. These steps work for all types of nail wraps, gel nail wraps, and press ons, though each may have specific variations we'll cover later.
Follow these five core steps:
- Clean and prep nails until oil-free and slightly textured
- Select the right size wrap, slightly smaller than your nail bed
- Peel and position at the cuticle, smoothing from center outward
- Trim and file excess material with downward strokes
- Seal with top coat or recommended method to extend wear
Step 1: Prepare Your Nails for Optimal Adhesion
Proper preparation is the foundation of long-lasting wear. Clean your nail plate thoroughly, remove all oils, gently buff the surface, and push back cuticles.
Preparation checklist:
- Use an alcohol wipe or nail cleanser to remove natural oils and lotions
- Gently buff the nail surface to increase grip (don't over-buff)
- Push cuticles back to prevent adhesive from contacting skin
- Trim any hangnails carefully
Step 2: Choose the Right Size
Select a wrap slightly smaller than your nail bed to avoid contact with skin and cuticle edges, which reduces lifting and irritation.
Sizing guide:
| Wrap Size | When to Use | Fit Guidance |
|---|---|---|
| Exact width match | Wide, flat nails | May need side trimming to prevent skin contact |
| Slightly smaller | Most nail shapes | Preferred – prevents cuticle overlap and edge lift |
| Narrower sizes | Tapered or curved nails | Use gentle heat or stretching for coverage |
Pro tip: Test-fit before removing the backing to confirm the best match.
Step 3: Apply Without Bubbles
The key to bubble-free application is controlled center-out smoothing with minimal handling of the adhesive surface.
Application technique:
- Carefully peel the protective film
- Position the wrap at the base near the cuticle
- Press and smooth firmly from center toward each side
- Use a silicone smoothing tool or cloth-wrapped cuticle pusher
- Apply steady, even pressure to expel air
- Use brief, gentle heat (hair dryer) only if product instructions allow
Step 4: Trim and File for a Perfect Finish
Proper finishing prevents premature peeling and creates a professional look.
Finishing steps:
- Use small manicure scissors to remove most excess
- File downward in a single direction to avoid lifting
- Cut close to the free edge without tugging
- Finish with firm downward strokes from edge to tip
- Gently buff the edge if needed
Step 5: Seal for Longevity
Apply a thin top coat to lock down edges and add shine, or follow product-specific curing instructions.
How to Make Nail Wraps Last Longer
Maximize wear time with proper sealing methods and aftercare practices.
Sealing Methods Comparison
Different types of nail wraps require different sealing approaches. Understanding which method works best for your chosen style ensures maximum longevity.
| Method | Effect on Longevity | When to Use |
|---|---|---|
| Top Coat | Seals edges, adds shine, resists chipping | Best for traditional nail wraps and press ons |
| UV/LED Cure | Polymerizes gel for hard finish | Required for gel nail wraps and Holy Grail Nail's holy gels |
Key Durability Tips
- Apply thin top coat and reapply at first sign of edge wear
- Limit water exposure for the first 2-4 hours after application
- Wear gloves for heavy chores and dishwashing
- Apply cuticle oil daily to maintain flexibility
- Re-seal lifting edges immediately with top coat
- Avoid using nails as tools
Troubleshooting Common Issues
| Issue | Likely Cause | Fix |
|---|---|---|
| Bubbles | Trapped air during application | Smooth center-out; reheat briefly if allowed |
| Lifting | Oil residue, wrong size, cuticle overlap | Clean thoroughly, choose smaller wrap, avoid skin contact |
| Wrinkling | Stretching or misplacement | Lift, reposition, smooth; avoid overstretching |
| Early peeling | Inadequate sealing or wet exposure | Seal edges with top coat, avoid water for 2-4 hours |
How to Fix Bubbles and Wrinkles
- Press with a silicone tool from center toward edges
- Use gentle warmth to relax adhesive (if product permits)
- For persistent defects, carefully lift the edge and reposition
- Work quickly to prevent permanent creasing
Preventing Lifting
- Always clean nails with alcohol wipe before application
- Choose wraps slightly smaller than nail bed
- Avoid touching the adhesive surface
- Seal edges thoroughly with top coat
- Keep hands dry for first few hours
Safe Removal
Protect your natural nails during removal:
- Soak edges in cuticle oil or approved remover
- Gently peel from side toward center
- Never force – reapply oil and wait if adhesive resists
- Buff lightly and apply cuticle oil to replenish moisture
Holy Grail Nail Product-Specific Techniques
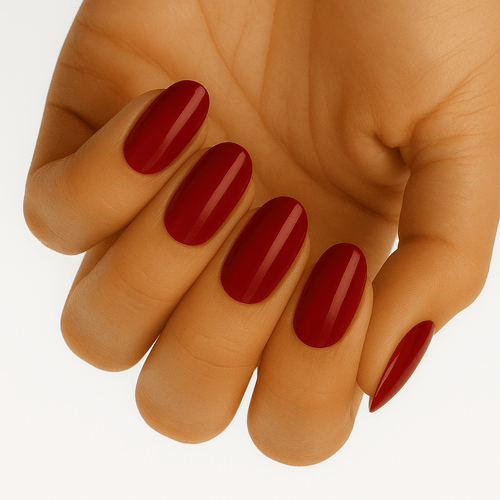
Holy Grail Nail offers three distinct wrap types, each with tailored application methods. Whether you prefer traditional nail wraps, our professional holy gels (gel nail wraps), or instant press ons, we have the perfect solution for your needs.
Classic Nail Wraps (No Lamp Required)
Our traditional nail wraps offer convenience without sacrificing quality.
Application steps:
- Peel backing and position at cuticle line
- Smooth from center outward, avoiding adhesive contact
- Optional: Apply gentle heat to improve adhesive flow (only if indicated)
- Trim and file edges
- Seal with thin top coat for shine and durability
Best for: Quick, convenient application without special equipment
Gel Nail Wraps (Professional Gel Finish)
Holy Grail Nail's holy gels deliver a durable, high-shine finish with proper UV/LED curing. Our gel nail wraps provide professional results without the salon price tag.
Application steps:
- Apply and smooth wrap thoroughly
- Cure under UV/LED lamp per manufacturer's instructions
- Apply gel top coat
- Perform final cure for extra shine and protection
Curing tips:
- Use compatible UV/LED lamp (see our Holy Grail Nail LED Lamp)
- Follow recommended cure times (typically 30-60 seconds)
- Avoid over-curing to prevent brittleness
- Follow lamp safety guidance
Best for: Long-lasting, glossy, professional-looking finish that rivals salon gel manicures
Why choose our holy gels: UV-cured durability meets easy at-home application for stunning results that last.
Press On Nails (Instant Application)
When you need flawless nails in minutes, press ons are the ultimate solution.
Application steps:
- Match each press-on to corresponding nail
- Apply adhesive tabs or glue as directed
- Press firmly for several seconds
- File or buff edges for seamless look
- Optional: Seal edges with top coat
Tips for best results:
- Ensure flush fit against nail with no gaps
- Avoid cuticle overlap
- Hold pressure long enough for secure bond
Best for: Instant manicure with maximum convenience
Expert Tips for Salon-Quality Results at Home
Prevent Bubbles and Wrinkles
- Work in moderate temperature, low-humidity environment
- Smooth immediately after placement
- Minimize repositioning
- Use silicone smoothing tool for even pressure
- Avoid overstretching the wrap
Timing for Maximum Adhesion
Best application times:
- Before bed (allows overnight setting)
- After shower when oils are removed
- During low-activity periods
Avoid applying:
- Right before heavy chores or exercise
- When nails haven't been properly cleaned
- In very humid conditions
Essential Tools and How to Use Them
Cuticle pusher: Gently push back cuticles after softening (don't damage nail matrix)
Silicone smoothing tool: Apply even pressure to finalize adhesion and remove air
Fine nail file: Remove excess with downward strokes to create sealed edge
Buffer: Lightly remove shine before base coat if needed (avoid over-buffing)
Why Choose Holy Grail Nail
When comparing nail wraps, gel nail wraps, and press ons from different brands, Holy Grail Nail stands out for quality and nail health:
- HEMA Free – gentle on nails and skin
- Vegan – no animal-derived ingredients
- Cruelty-Free – never tested on animals
- Non-damaging application methods
- Professional results at home
Our holy gels (gel nail wraps) deliver the glossy, long-lasting finish you'd expect from professional gel manicures, while our classic nail wraps and press ons offer versatile options for every lifestyle and preference.
Our starter kits include all the tools you need: smoothing tools, precision files, and recommended sealing products for perfect application every time.
Quick Reference Guide
For Best Results:
- Start with completely clean, oil-free nails
- Choose wraps slightly smaller than your nail bed
- Smooth from center outward to prevent bubbles
- File in one direction with downward strokes
- Seal edges thoroughly with top coat
- Allow 2-4 hours before water exposure
- Apply cuticle oil daily for maintenance
Common Mistakes to Avoid:
- Skipping nail prep or leaving oils on nails
- Choosing wraps that are too large
- Touching the adhesive surface
- Not sealing edges properly
- Heavy water exposure immediately after application
- Using nails as tools
Master these techniques and you'll achieve flawless, long-lasting nail wraps that rival any salon manicure – all from the comfort of your home.