
Master Gel Nail Wraps With These Simple Steps
Master Gel Nail Wraps With These Simple Steps: Your Complete DIY Gel Manicure Guide
Gel nail wraps (also called semi-cured gel wraps, semi cured gel strips, semi cured nail strips, uv gel wraps or gel nail strips) are revolutionizing at-home manicures. These thin, pre-styled gel layers deliver a chip-resistant, salon-quality gel manicure at home—no mess, no brushes, just peel, stick, and cure.
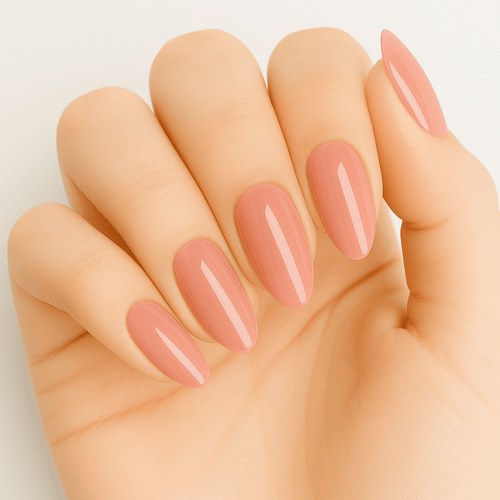
Whether you're new to gel nail wraps at home or looking to perfect your technique, this comprehensive guide covers everything: nail preparation, UV cured application, achieving long-lasting wear, and safe removal—all while protecting your nail health with HEMA-free formulations.
What Are Gel Nail Wraps?
Gel nail wraps are pre-designed, semi-cured gel strips that adhere to your natural nails and cure under a UV/LED lamp to create a durable, glossy finish. Unlike traditional gel polish that requires multiple layers and precise brush application, gel nail wraps simplify your DIY gel manicure into a straightforward process that takes minutes instead of hours.
How they work: The adhesive layer bonds to your prepared nail plate, then permanently sets when exposed to UV light in your lamp, delivering 2+ weeks of chip-resistant, professional-looking gel nails.
How to Prepare Your Nails for Gel Nail Wraps
Proper preparation is the foundation of any long-lasting DIY gel manicure with gel nail strips. Creating an oil-free, smooth nail surface allows your gel nail wraps to bond strongly and resist lifting.
Essential Nail Prep Steps
Follow these steps in order for maximum adhesion:
- Remove old polish completely and wash hands thoroughly
- Clean with nail dehydrator or alcohol wipe to remove all oils
- File and shape the nail edge to your desired length and shape
- Gently buff the surface to create light texture (don't over-buff)
- Push back cuticles with a cuticle stick—don't cut live tissue
- Final cleanse with alcohol wipe immediately before application
Pro tip: Use a nail dehydrator for best results. Skipping this step is the #1 cause of early lifting in gel nail wraps at home.
Why Preparation Matters for UV Cured Gel Nails
An oil-free, slightly textured surface creates better mechanical and chemical bonding, which means:
- Reduced early lifting and peeling
- Extended chip-resistant wear (2+ weeks)
- Better edge contact and seal
- Fewer bubbles during application
Essential prep tools:
- Nail file (180-240 grit)
- Buffer block
- Cuticle stick
- Nail dehydrator or alcohol wipes
- Optional: nail clippers for length control
Step-by-Step: How to Apply Gel Nail Wraps at Home

Achieving a perfect DIY gel manicure with gel nail strips combines correct sizing, precise placement, proper smoothing, and controlled UV curing.
Complete Application Process
Step 1: Size and Test Fit
- Select the strip width closest to your nail without overhang
- Test fit while backing is still on to check alignment
- If between sizes, choose the smaller and plan to file edges
Step 2: Peel and Position
- Slowly peel backing to avoid stretching the gel
- Align rounded end at the cuticle line (don't touch skin)
- Press center first to seat the wrap
Step 3: Smooth and Remove Air
- Work outward from center to free edge
- Use a cuticle stick or silicone pusher to remove bubbles
- Press firmly along edges to seal
- Inspect for trapped air and re-smooth if needed
Step 4: Cure Under UV/LED Lamp
- Place hand flat in your UV/LED lamp
- Cure for recommended time (usually 60-90 seconds)
- Ensure lamp wattage matches product requirements
- Don't move fingers until fully cured

Step 5: Trim and File
- Trim excess close to free edge with small scissors
- File in one direction with 180-240 grit file
- Lightly buff the seam to blend
- Clean dust before top coat
Step 6: Apply Top Coat (Optional)
- Use gel-compatible top coat for extra shine
- Apply thin, even layer
- Cure again if required by top coat brand
- Avoid pooling at edges
Gel Nail Wraps vs. Classic Wraps: Key Differences
| Feature | Gel Nail Wraps | Classic Nail Wraps |
|---|---|---|
| Application | Peel, stick, cure under UV lamp | Peel, stick, seal with top coat |
| Curing | Requires UV/LED lamp | No lamp needed |
| Finish | Hard, glossy gel finish | Smooth, sealed finish |
| Durability | 2-3 weeks chip-resistant | 1-2 weeks with care |
| Removal | Gentle peel or light soak | Gentle peel with oil |
| Best For | Long-lasting DIY gel manicure | Quick, convenient application |
How to Cure Gel Wraps with UV/LED Lamp
Proper UV curing is what transforms your gel nail wraps from adhesive strips into a durable, chip-resistant gel manicure.
Curing Guidelines for Perfect Results
UV/LED Lamp Requirements:
- 36W minimum recommended (48W+ ideal)
- UV or LED wavelength compatible with your wraps
- Timer function for consistent curing
- Adequate interior space for full hand
Typical Cure Times:
- 60 seconds: High-wattage LED lamps (48W+)
- 90 seconds: Standard LED lamps (36-48W)
- 120 seconds: UV lamps or lower wattage
Signs of Under-Curing:
- Tacky, sticky surface after cure
- Soft spots that dent with pressure
- Premature chipping within days
Signs of Over-Curing:
- Excessive heat during cure
- Brittle, inflexible finish
- Yellowing (rare)
Pro tip: Holy Grail Nail's gel wraps are formulated for optimal curing at 60 seconds in a 48W LED lamp, delivering the perfect balance of durability and flexibility.
Making Your DIY Gel Manicure Last Longer
Extend your gel nail wraps to 2-3 weeks with proper care and by avoiding common mistakes.
Common Mistakes That Shorten Wear Time
❌ Skipping nail dehydrator → Oils cause lifting within days ❌ Choosing oversized strips → Overhang leads to peeling ❌ Under-curing → Weak, tacky surface prone to chips ❌ Rough treatment immediately after → Edges haven't fully set ❌ No top coat → Misses extra protection layer
Post-Application Care for Long-Lasting Gel Nails
✅ Apply cuticle oil daily – Hydrates nail-skin interface and supports edge adhesion ✅ Wear gloves for chores – Protect from harsh detergents and solvents ✅ Avoid prolonged soaking – Limit long baths/swimming in first 24 hours ✅ Patch lifts immediately – Use tiny amount of top coat to secure edges ✅ Be gentle on nails – Don't use them as tools
Quick Longevity Guide
| Action | Tool/Product | Expected Outcome |
|---|---|---|
| Proper sizing & smoothing | Cuticle stick, nail file | Reduced lifting and bubbles |
| Correct UV curing | UV/LED lamp (48W) | Strong bond, chip resistance |
| Thin top coat | Gel-compatible top coat | Increased shine, 2-3 week wear |
| Daily cuticle oil | Nourishing cuticle oil | Healthy nails, better adhesion |
How to Safely Remove Gel Nail Wraps
Gentle removal protects your natural nails by softening adhesive bonds rather than forcing them off.
Gentle Removal Process
Method 1: Oil Soak (Recommended)
- Apply warm cuticle oil generously to all nail edges
- Wait 5-10 minutes to let oil penetrate adhesive
- Gently lift edge at free edge with cuticle stick
- Peel slowly at low angle from free edge to cuticle
- If resistant, reapply oil and wait longer—never force
Method 2: Light Soak (for stubborn wraps)
- Soak nails in gentle acetone-free remover or warm water with oil
- Wait 10-15 minutes until edges begin lifting
- Gently peel as above
- Stop if painful and continue soaking
Post-Removal Care
After removing your gel nail wraps at home:
- Clean nails with gentle cleanser
- Apply generous cuticle oil to all nails
- Let nails rest 1-2 days before next application (optional)
- Continue daily oil application to restore natural oils
- Avoid aggressive buffing or filing immediately after
Never do this:
- Don't pry with metal tools
- Don't force peeling if resistant
- Don't skip post-removal hydration
How Cuticle Oil Helps Damage-Free Removal
Cuticle oil penetrates the adhesive interface and lubricates the nail-skin junction, which:
- Softens the adhesive bond naturally
- Reduces mechanical force needed for removal
- Prevents white spots and damage to nail plate
- Restores natural oils for healthy recovery
Apply oil before, during, and after removal for best results.
Why Choose HEMA-Free Gel Nail Wraps

HEMA-free gel wraps eliminate the common allergen HEMA (hydroxyethyl methacrylate), making your DIY gel manicure safer and gentler on your nails.
Benefits of Holy Grail Nail HEMA-Free holy gels
Health & Safety:
- Reduced risk of allergic reactions and sensitivity
- Gentler on natural nails and surrounding skin
- Lower chemical exposure for frequent users
- Suitable for sensitive skin types
Application & Removal:
- Often easier removal with less aggressive solvents
- Less nail plate damage during removal
- Gentler formulation overall
Quality:
- Still delivers 2+ weeks chip-resistant wear
- Same glossy, professional gel finish
- UV cured durability without compromise
HEMA-Free vs. Traditional Gel Polish
| Feature | HEMA-Free Gel Wraps | Traditional Gel Polish |
|---|---|---|
| Application | Pre-designed, no brushing | Requires steady hand, multiple coats |
| Allergen Risk | Low (HEMA-free) | Higher (often contains HEMA) |
| Removal | Gentle peel with oil | Aggressive acetone soak + filing |
| Skill Level | Beginner-friendly | Intermediate to advanced |
| Time | 10-15 minutes total | 30-45 minutes |
| Nail Damage | Minimal | Can thin nail plate with repeated use |
Vegan & Cruelty-Free Formulations
Holy Grail Nail's gel wraps are:
- HEMA-Free – no common allergens
- TPO-Free – additional irritant avoided
- Vegan – no animal-derived ingredients
- Cruelty-Free – never tested on animals
This means cleaner formulations that prioritize your nail health without sacrificing the professional gel manicure finish you want.
Complete DIY Gel Manicure Toolkit
Everything you need for perfect gel nail wraps at home:
Essential Tools:
- UV/LED lamp (48W recommended)
- Nail file (180-240 grit)
- Buffer block
- Cuticle stick or silicone pusher
- Small manicure scissors
- Nail dehydrator or alcohol wipes
Products:
- Gel nail wraps (Holy Grail Nail's holy gels)
- Gel-compatible top coat
- Cuticle oil
- Gentle nail cleanser
Optional but Helpful:
- Press-on nail remover for stubborn adhesive
- Crystal nail file for gentle finishing
- Cuticle trimmer (use carefully)
Quick Reference Guide: Perfect Gel Nail Wraps Every Time
Best Practices Checklist
✓ Start with completely clean, oil-free nails ✓ Use nail dehydrator before application ✓ Choose wraps slightly smaller than nail bed ✓ Smooth from center outward to prevent bubbles ✓ Cure for full recommended time ✓ File in one direction with downward strokes ✓ Apply thin top coat for extra protection ✓ Allow 2-4 hours before heavy water exposure ✓ Apply cuticle oil daily ✓ Wear gloves for household chores
Troubleshooting Common Issues
| Problem | Cause | Solution |
|---|---|---|
| Early lifting | Oily nails, wrong size | Use dehydrator, choose smaller size |
| Bubbles | Trapped air | Smooth firmly from center out |
| Tacky surface | Under-cured | Cure longer, check lamp wattage |
| Chipping within days | Poor prep or curing | Follow all prep steps, cure fully |
| Won't stick | Natural oils present | Double cleanse with dehydrator |
| Painful removal | Forcing peel | Soak longer with oil, never force |
Why Holy Grail Nail for Your DIY Gel Manicure
When it comes to gel nail wraps at home, Holy Grail Nail delivers professional results with products designed for your health and convenience.
What makes our Holy Grail Nail holy gels different:
✨ HEMA-Free & TPO-Free – Gentle, low-allergen formulations ✨ Vegan & Cruelty-Free – Ethical beauty you can feel good about ✨ UV Cured Durability – 2-3 weeks chip-resistant wear ✨ Beginner-Friendly – No salon skills required ✨ Stunning Designs – Professional patterns and colors ✨ Complete Kits – Everything you need to get started
Our gel nail wraps are specifically formulated for optimal at-home application—pre-sized for easy fit, perfectly semi-cured for strong bonding, and designed for gentle removal that protects your natural nails.
Start Your Gel Nail Journey
Whether you're trying gel nail wraps for the first time or perfecting your DIY gel manicure technique, Holy Grail Nail makes it easy to achieve salon-quality gel nails at home.
Explore our collections:
- Classic gel nail wraps in trending colors
- Statement patterns and seasonal designs
- French manicure gel wraps
- Starter kits with lamp and tools included
Transform your manicure routine with UV cured gel perfection—no salon appointment necessary.
Key Takeaways
For perfect gel nail wraps at home:
- Preparation is everything—clean, dehydrated nails are essential
- Proper UV curing creates the chip-resistant finish
- Choose HEMA-free formulations for healthier nails
- Daily cuticle oil extends wear and protects natural nails
- Gentle removal with oil prevents damage
Master your DIY gel manicure with these techniques and enjoy 2-3 weeks of flawless, professional-looking gel nails—all from the comfort of home.
Ready to experience the holy grail of at-home gel manicures? Your perfect gel nail wraps await.